
I love this little beach in the south of Tasmania – Drip beach seems such a humdrum name for such a gem of a place ! I painted this over the weekend and tried my hand at a time lapse video which I’m trying to edit to post on YouTube this week. Apparantly it’s very simple – I’ve heard that before! Actually I’ve already downloaded some software and done the time lapse bit but the music soundtrack didn’t appear to “stick” and it’s a silent movie – will have another Google and see if there’s a fix for that before I post it.
I also did a full length video of the process – the painting took an hour so not sure if anyone will ever want to sit through that. And I learned that I like to chew my cud whilst painting – who knew! So from now on I’ll have to mindful of all my little painting foibles and do a bit of editing before I hit record. I still have to do the voice over so that might have to wait till later for it’s first night release – so hold off on the popcorn and choc top ice cream till further notice!
Given all the delays that are bound to happen as I navigate the technological maze ahead I thought I’d just throw up a quick still demo here. Apologies for the photos which are not my usual quality – I took some stills from the video and didn’t realise they would be so low res.
Sketching up
Just a few simple charcoal lines to block in the basic shapes of tree line, beach and rocks. There’s no real detail and the rocks will change as I go on.

The sky
Here I just layer in loosely some soft pinks and yellows near the tree line and then some light blues at the top of the sky . I run the blues over the pinks and yellows and then with the side of my finger blend the colours together to cover the reddish background colour. I don’t really want the backgrund to show through here but it will give a bit of an underglow to the sky.
")
")
Next I go back in with the same colours and lay a light layer down to bring back the luminosity to the sky. The crystal structure of the pastels allows the light to bounce off them but not if they’re all pushed into the paper. That’s why I go back again to get a looser layer on top – I want that light and luminosity back again!

The trees
Now I start to block in the tree shapes starting with some deep dark blues along the beach edge . I follow with some lighter greens , golds and siennas. I work the whole area going back and forth until I have a good balance of dark shadows and sunlit areas. I will come back later and adjust. I also add a sliver of sand at the base of the headland.
")
")
")
The Water
Using a light blue similar to the sky value I start laying in the water. I pop in sonme of the tree colours from the headland as reflections and then just smooth them a little with the side of my finger. I let some of the back ground colour show through the water.
")
")
I add deeper, darker colors for the water in shadow at the beach edge along with some darker blues.

The beach
Now I want to get the beach established which I do by laying in strokes of purples for the shadowed sand and pinks where the sunlight finds it’s way through the dense trees. I add some sienna next to the dark water where the sun is shining and the contrast really helps to add a bit of zing to this area.

Back to the water
In with some deeper blues, a few rocks and some white foam around the rocks. I also start some dark shadows in the rocky area.

Now for the rocks
With a deep purple I block in the shadows and then use a cream colour for the brightest highlight on the rocks. Then I can start modelling the rocks using mid value oranges, golds and greys. I then come back in with blues and browns in the shadows until I have the rock shapes defined.
")
")
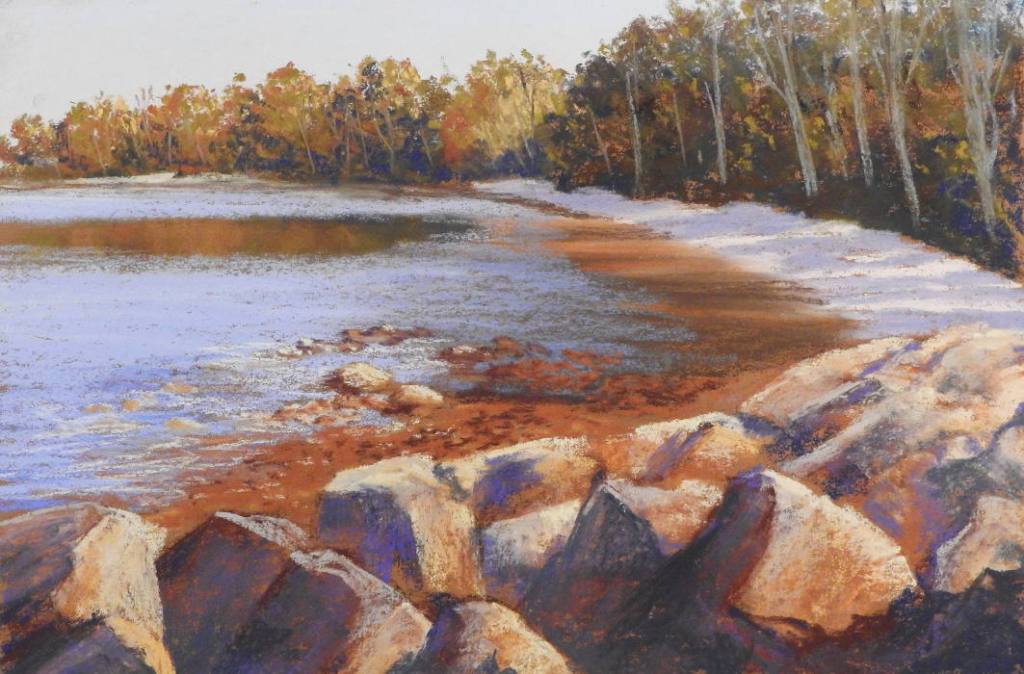
A final round up
I go back over the painting adding a little here and subtracting a little there. I tidy up the rock shapes, add some grey tree trunks amongst the foilage, refine the pebbly area next to the rocks and the painting is done.

You can also watch a time lapse video or the full narrated 30 minute video.

Leave a comment