

After a weekend visit to the Tasmanian Craft Fair I was inspired to try my hand at eco dying. The Writer bought me a beautiful autumn eco printed wool scarf in Italy this year which I love – the colours are soft oranges and muted browns on a cream ground. I treated myself to a locally made silk scarf with a smokey grey and burnt orange print of eucalyptus leaves at the fair and headed home with a plan to try it myself. (Craft fairs will do that to me – I have a list of three new crafts to try from this fair!)
So I did a lot of googling and found some great articles on how to eco print and had a stab at it. My first attempt gave me some gorgeous colours despite my slapdash approach! I would have pre mordanted the cloth with alum if I’d had any but really I couldn’t wait to try it so I just spread lots of eucalyptus leaves and rusty slabs from the old corrugated roof I ripped off the Potter’s shed onto a length of calico, placed another piece over it and rolled it all tightly around a metal pipe. Then I wrapped it with string and placed in on a rack above simmering water. I covered the whole thing with foil to seal in the steam and left it to do it’s magic for a couple of hours.
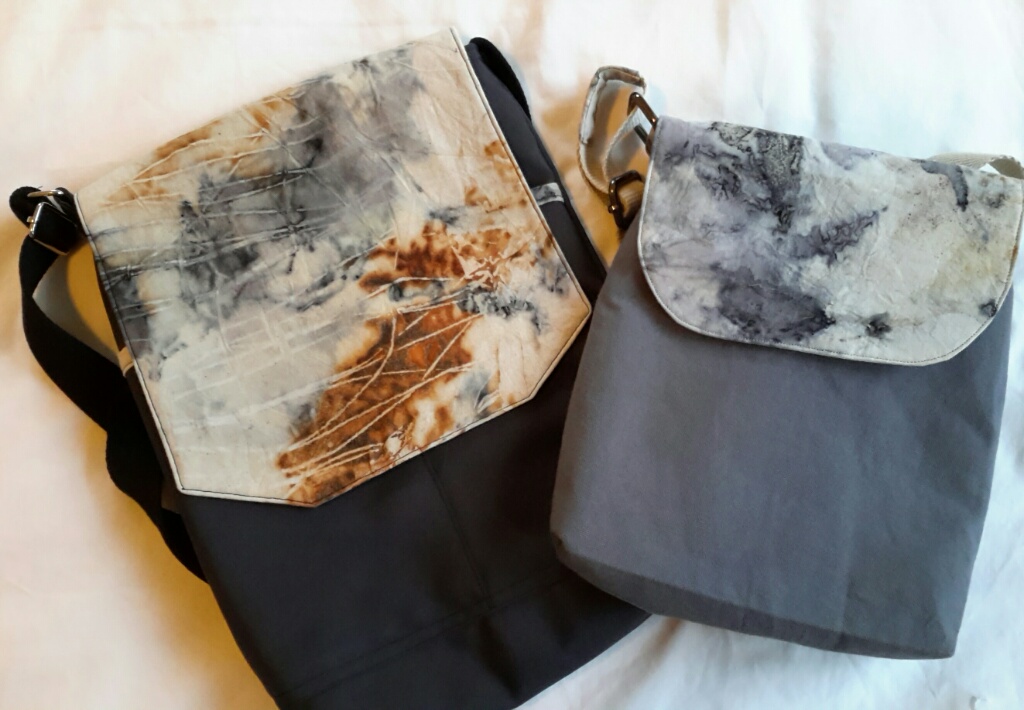
I love the rusty colours and those smokey greys. I was a bit too liberal with the rusty metal additions and lost the eucalyptus pattern but didn’t mind as I like the abstract design that emerged.
The next day I went out and bought some alum from my local art supply shop. It was pretty pricey but will last for ages and as I’ve got the bug I’ll be getting my monies worth out of it. So, armed with the alum I pre mordanted my second batch of fabric by soaking in a 10% alum solution overnight ( 10% of the weight of the dry fabric mixed with enough water to cover the fabric). Mordanting helps the dye from the leaves attach to the fabric. Then I repeated the process of layering the wet fabric with leaves ( I used maple leaves from the garden this time), rolling and tying. Then into the steamer for 2 hours. This batch was more successful at capturing the leaf shapes and I managed to get some subtle greens as well.


I’m a quick project girl and I love the fact this requires so little time and yields such interesting and unpredictable results. I can see me doing a lot more eco printing and dyeing in the future. Can I see me keeping a detailed note book of each experiment as every googled article suggests? Nope! I know I should but I also know I won’t – best just to acknowledge my lack of crafting rigour and get on with the dyeing and enjoy the anticipation every time I snip the string, unravel the cloth and release the print.
Eco dyeing has been a comfort to me this week, making something beautiful feels like a small antidote to the madness that has been the US elections.

Leave a comment