
I’ve just booked into the Pastel Expo to be held in Caloundra in September and am pretty excited to have got into Tony Allain’s plein air workshop. He’s an amazing pastel artist and I count myself fortunate to have managed to swing a place.
Because I’ll be flying up and then walking from the accommodation to the convention centre I started thinking about what sort of kit I could take that would be light enough to carry yet hold a decent amount of pastels and a half sheet size paper for the two workshops I’m booked into.
I already have a very portable plein air setup for hiking which fits in my backpack. A small Guerilla pochade box in which I can fit 8 little tins filled with small pastel pieces and a quick release plate so I can attach to my light travel tripod head. The lid serves as a support for paper and small painting boards and I can also use it for acrylics and pastels. I can also lay a larger box of pastels on the tray if I need more.


I love this light and portable setup but sometimes I want to paint larger and have a slightly more sturdy tripod so I started looking online and found the ideal setup, the only downside is the cost and shipping , the whole kit came in at around $700! That’s a lot of money I could be spending at the Expo trade show on pastels!.
Instead I made my own version using a free Slik tripod a friend gave me, $20 piece of plywood, a few dollars worth of hardware and a couple of hours to put together. It’s very stable and fits a full size box of Unison pastels and a half sheet of Colourfix paper .
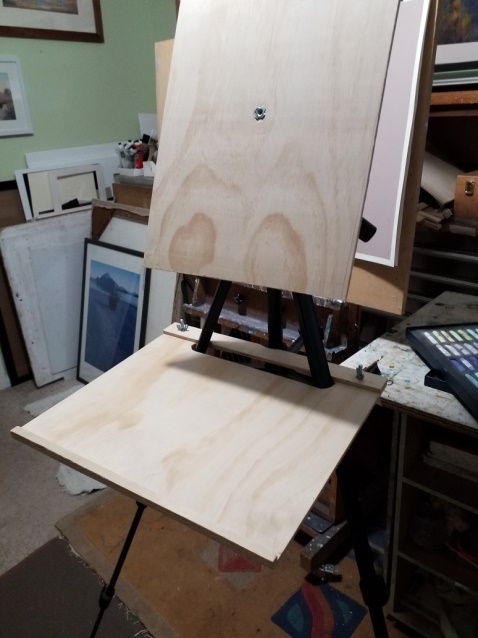
The shelf attaches to the tripod legs and has a lip to keep the pastel box from slipping off. It works fine without the wing nut secured strip at the rear which I added just as a precaution. I like a bit of extra security!
The support board has a small inset threaded hole in the back ( like a camera has) to accept a quick release plate and attaches to the tripod head so it can rotate into horizontal and vertical positions and can tilt flatter for watercolours.
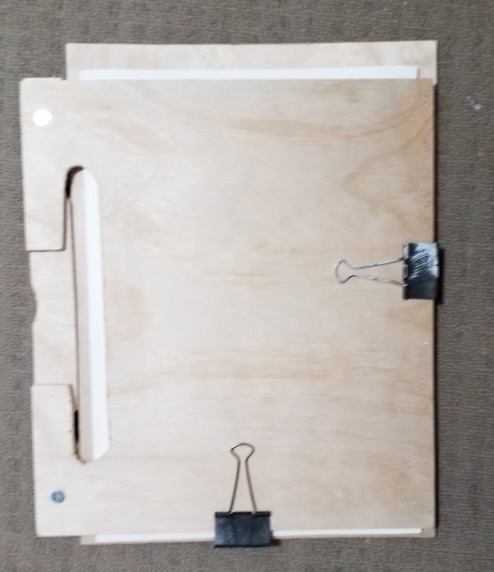
When taken off the tripod it packs flat and I can keep a stack of my pastel paper between the boards secured with a couple of bulldog clips. On a recent trip I kept all my paintings seperated by glasine in a stack with my unused paper. No smudging, and everything nice and compact.
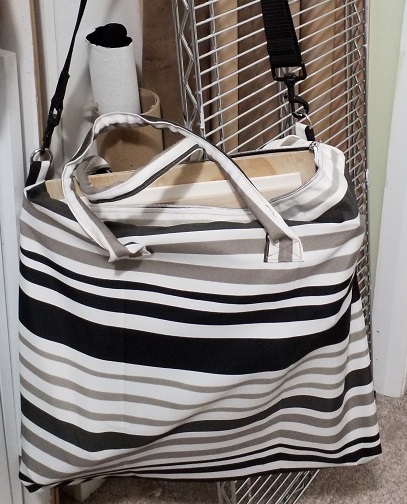
It packs into a bag I made for it with a shoulder strap and carry handles.

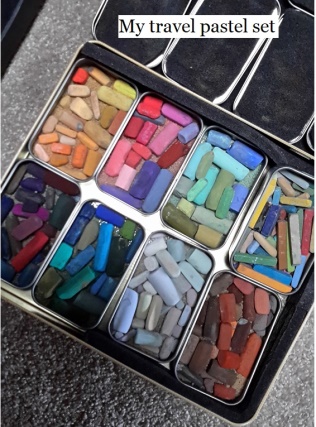
I have a good wooden pastel travel box I made earlier but it’s a little heavy so I made a lightweight box out of foamcore and gaffer tape and added some dividers and a lid with memory foam padding. I secure the box with two wide elastic straps.
Here is the setup on location at the Warummbungles , New South Wales

I also made a set for my light tripod that has an easel attachment with adjustable panel holders will take different size canvases and boards. I can set up my small stay wet acrylic travel palette on the shelf along with a collapsable water container and my brushes. I will probably drill some brush holder holes in the tray later on.
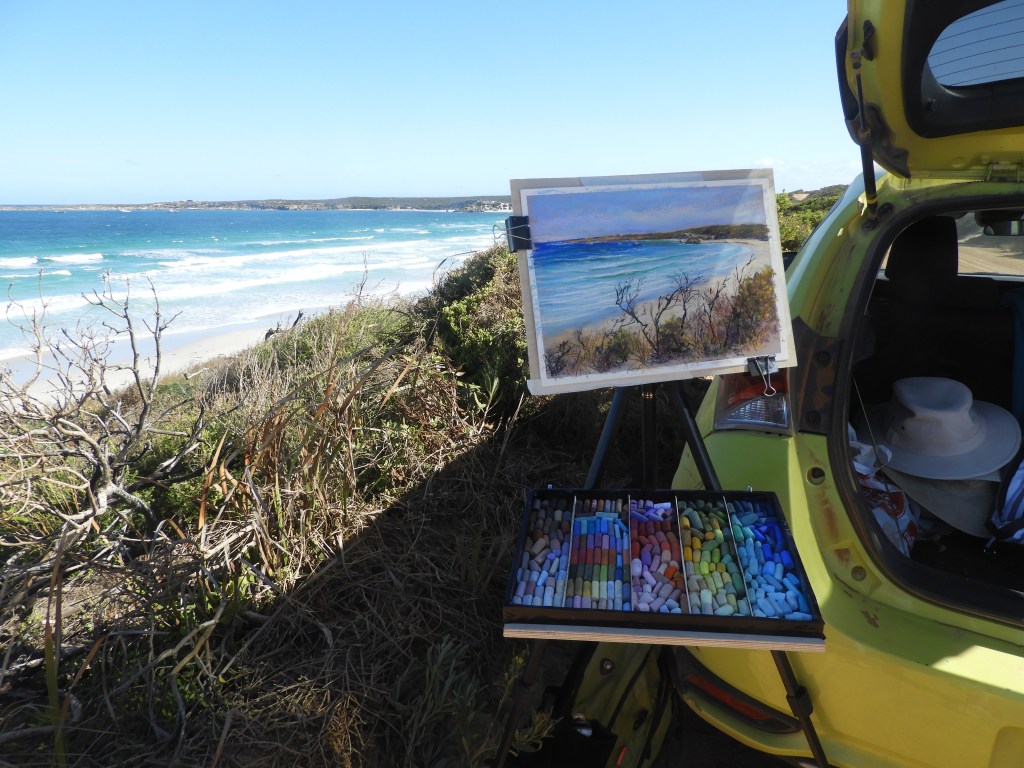
This was setup in a howling gale and everything stayed upright for an hour of painting. It helped having it sheltered a bit by the car. This is on the very beautiful Flinders Island, South Australia.
All in all I’m pretty chuffed with this cheap, light and portable plein air kit. It only takes seconds to pack and unpack, gives me plenty of pastels and lets me use a decent size paper.
Do you have a favourite setup for painting in the great outdoors? I’m happy to hear of any improvements you can suggest.

Leave a comment